Sunday, May 12, 2013

Smoker build

So, another distraction from my guitar build was a craving for some barbecue! I wanted to up my game smokerwise, and decided to revisit some ideas from the past, an "ugly drum smoker."

If you Google "ugly drum smoker" (hereinafter referred to as "UDS") you can find all the info you need to build your own. I did some Internet perusing, and here is my version.

I do not know how to weld, so had to get creative with my charcoal basket. With some expanded metal and a charcoal grill grate and a few stainless steel bolts my basket was ready to roll. I put a chain on it to make setting it in the UDS easier:


Here is the basket in the barrel:


Next, I got an old, food grade, 55 gallon steel drum. First, I had all of the interior lining and exterior paint sandblasted off. Next, I began drilling holes for the various attachments I had going in it. Here you can see some of the screws inserted. These hold up the grill grate.


After drilling most of the holes, I painted the exterior with engine enamel to better protect the steel from the elements, as well as give it a classy look. I chose "Old Ford Blue," which I thought was a good, attractive color for a smoker.


I then put all of the parts on the UDS. Here is the finished product (except for my air intake).


For the air intake, I rigged up a black pipe coupling to connect my iQue110 (seen here: www.pitmasteriq.com). The iQue has a thermometer you run into the UDS, and it tells the iQue the current temp. If it is too low, the iQue kicks a fan on and boosts the temp. This allows me to sleep at night instead of waking up every hour to check temp. Here is a picture of how it is set up:


You use the knob at the top to indicate what temperature you would like (225 for me) and the iQue takes care of the rest. It will even alert you when you are over temp, or when the lid is off/losing temp rapidly.

I started a pork butt last night. Needless to say, I was so anxious to try it out I forgot to take a picture of the butt. Here is my sandwich though. Not bad for a first run.


Kati finished up a headstock template for me this week that I can print out and glue to some wood. You should expect to see some guitar project posts here in the somewhat near future (I have to graduate from law school this next week, so some focus will be shifted to wrapping that up...). All for now!

Monday, April 29, 2013

Gardening (aka why I haven't been working on the guitar)

So, you may have noticed tha I have not updated my blog in a few weeks. That is because I have been preoccupied with a few other projects, one of which was the yard/garden. A few years ago, we had to remove some trees in our backyard, and, as a result, our full shade backyard turned into a full sun one. Much of the growth back there died off, and Kati and I needed to spruce it up a bit. We prepped the beds back there and planted more sun loving plants where the old, dead ones were. We also put some more shade plants in some of the still shady areas. One of our favorite choices was our pink double knock-out roses. Kati likes to go out and count the blooms everyday and get excited about new flowers, and it is quite entertaining. Here are some pictures from various stages of the project.


I also planted what I am going to call a "garden that has plants that attract butterflies to it" in our front yard (apparently "butterfly garden" isn't a particularly masculine term). Here are some pictures when I was working on it:


We have just a little bit more work to do, and I think we will be at a good stopping point for the yard for this season. I have another project to post as well, when I get some better pictures documenting it.

Tuesday, April 2, 2013

Guitar build, spanish heel

This past week I worked on getting the spanish heel cut in the guitar. Unlike steel-string guitars (or what most perceive as the standard acoustic guitar) that have dovetail joints (again, most have dovetail joints where the neck meets the body), classical guitars join to the body at what is called the spanish heel. I employed the assistance of Dave, the father-in-law, and several of his tools to complete this task.

In order to cut the slots in the heel for the sides, Dave and I first had to square up the heel block. We did that on the disc sander.


Looks pretty good to me!


Then we had to mark the center of the neck, and the depth mark for the slots we were going to cut.


After all that, we spent a whopping amount of time truing up and squaring up the table saw. I am not ready to admit how long it took us, but needless to say we got it as close as we possibly could.


To keep the spacing the same for both cuts, we used a piece of scrap wood to act as a sort of spacer between the fence and the neck. It may be hard to visualize how that all works together, but these images should give you some idea.


And here is the result.

Tuesday, March 26, 2013

Guitar build, heel block

Remember that piece of wood that I cut off of the neck blank a post or two ago? The one that I made sure to label the grain orientation, top, and bottom? If you don't, I included a picture of it below. I have measured it into roughly equal portions that I will cut up and glue to the neck blank to create the heel block.


To make sure that I had the direction and grain orientation correct when I glued it up, I cut the blank and labeled it as follows:

 Top
Board: [1 ↑ | 2 ↑ | 3 ↑]
Bottom


It all ended up being glued like this:

[Neck blank]
               [1↑|
               |2↑|
                |3↑]


And here is the finished product:

That's all for now. I hope to have you a few more interesting posts in the next several days.

Saturday, March 23, 2013

Guitar build, headstock veneers


This is the first step where I get to make the guitar (or piece of wood that at some point will hopefully begin to resemble a guitar) look fancy/like a guitar. Whatever that is worth, I am now gluing on the headstock veneers. I will also interject now and say that I have failed you readers, and did not document me planing down the top, flat side of the neck. I did this with the help of Dave, the father in law, and his jointer. It was planed in a manner to give some overall taper to the neck. Honestly, there wasn't much to see (not that you will know, you'll just have to take my word for it).

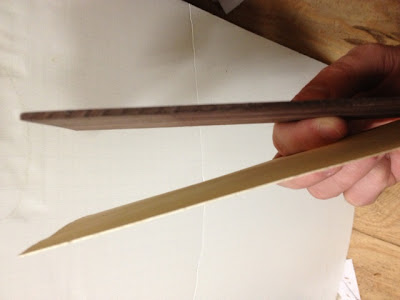
As you see, I have both a maple and a rosewood veneer to be glued:


And one is much thinner than the other. The thinner maple will go between the headstock and the rosewood.


Before you do some clamping, best get your clamps together.


Here you can begin to visualize what it will look like. I rearranged the rosewood a few times and determined that I like it with the grain going vertically, with the wider grain nearer the bottom.


Veneer is glued and clamped:


Note that I left some of the veneer overhanging where the headstock, that will get cleaned up in the next few steps.


I set up a saw fence to saw off that excess.


And the saw of choice today will be the dozuki saw. It is a Japanese saw with a very thin kerf and it cuts on the pull stroke, making this a very precise saw. I suppose it could also be some sort of scary movie villain's weapon too...


And after some sawing, I'll finish cleaning it up with a chisel.


That looks a lot better. I also planed/scraped down the sides so that they were flush with the headstock. You can see in the following photo how the maple looks sandwiched between the headstock and rosewood.


Thursday, March 21, 2013

Guitar build, the planing begins...


So here is the next set of progress photos. You can see the scarf joint all glued up at this point:


And here is a closeup. Notice the overhang on the top of the headstock. That portion is going to be removed via bandsaw and then planed even and flat. I drew the line you see on the side of the headstock at 18mm from the back of the headstock so that I would have a reference point when sawing and planing. Here is the closeup with the line drawn:


I feel like this next picture is of some sort of scene in a movie portraying the impending doom of a canoe fast approaching a waterfall, except that it is wood fast approaching a band saw...


Tah dah! A nice, uneven band saw cut. To the handplane!


(Note that I did not cut on the line, but right above it, to give me room to plane to the correct depth. This is a better way to get more exact results, and makes the uneven cut a non-issue)

Because I do not have a fancy woodworker's bench, with all of the holes for benchdogs and nice built in vices for clamping complex wood projects, I clamped the neck to my router table. To support the headstock, I put a saw horse with a wood block on it under the end of the headstock, and slid a wedge of wood up until it was tight (but not so much force that I might break the headstock). I then proceeded with the planing.

Notice the line where the two glued up pieces of wood come together on the headstock. It helped me when planing to refer to this line, because I could tell when things were flat and true (when the line was straight, and not wavy). I also drew a square line near the beginning of the headstock to use as a reference for my planing (you can see it near my fingers). After a few minutes (60?) I had the final thicknessed product.

Then, I needed to get rid of some of the extra wood on the neck blank to get the neck to the right length. I did some approximate (but very precise too) measurements for where the 12th fret would land (the 12th fret being exactly half the distance between the nut and the saddle, which is why you can get natural harmonics on a guitar string at this location), and added an inch for the part of the neck inside the body (classical guitar thing). I then drew a line, and cut off the excess, which I will use to stack up and glue together for the heel (to be seen in the near future).


Note: it is always good to mark the orientation of the board you just cut, in case you want to refer later to which direction the grain was traveling and what side of the board was facing which way. This is why I marked it with the diagonal line you see and made a little note on the board.

All for now!